Top 5 Mistakes Rappers Make When Recording at Home
Recording at home has become the go-to method for many independent rappers who want full control over their creative process without breaking the bank. However, even with all the conveniences, home recording can present some challenges, and mistakes are easy to make if you’re not paying attention to the finer details. These errors can lead to poor sound quality, wasted time, and tracks that don’t reach their full potential. In this article, we’ll break down the top 5 mistakes rappers make when recording at home and how you can avoid them to ensure your tracks sound as professional as possible.
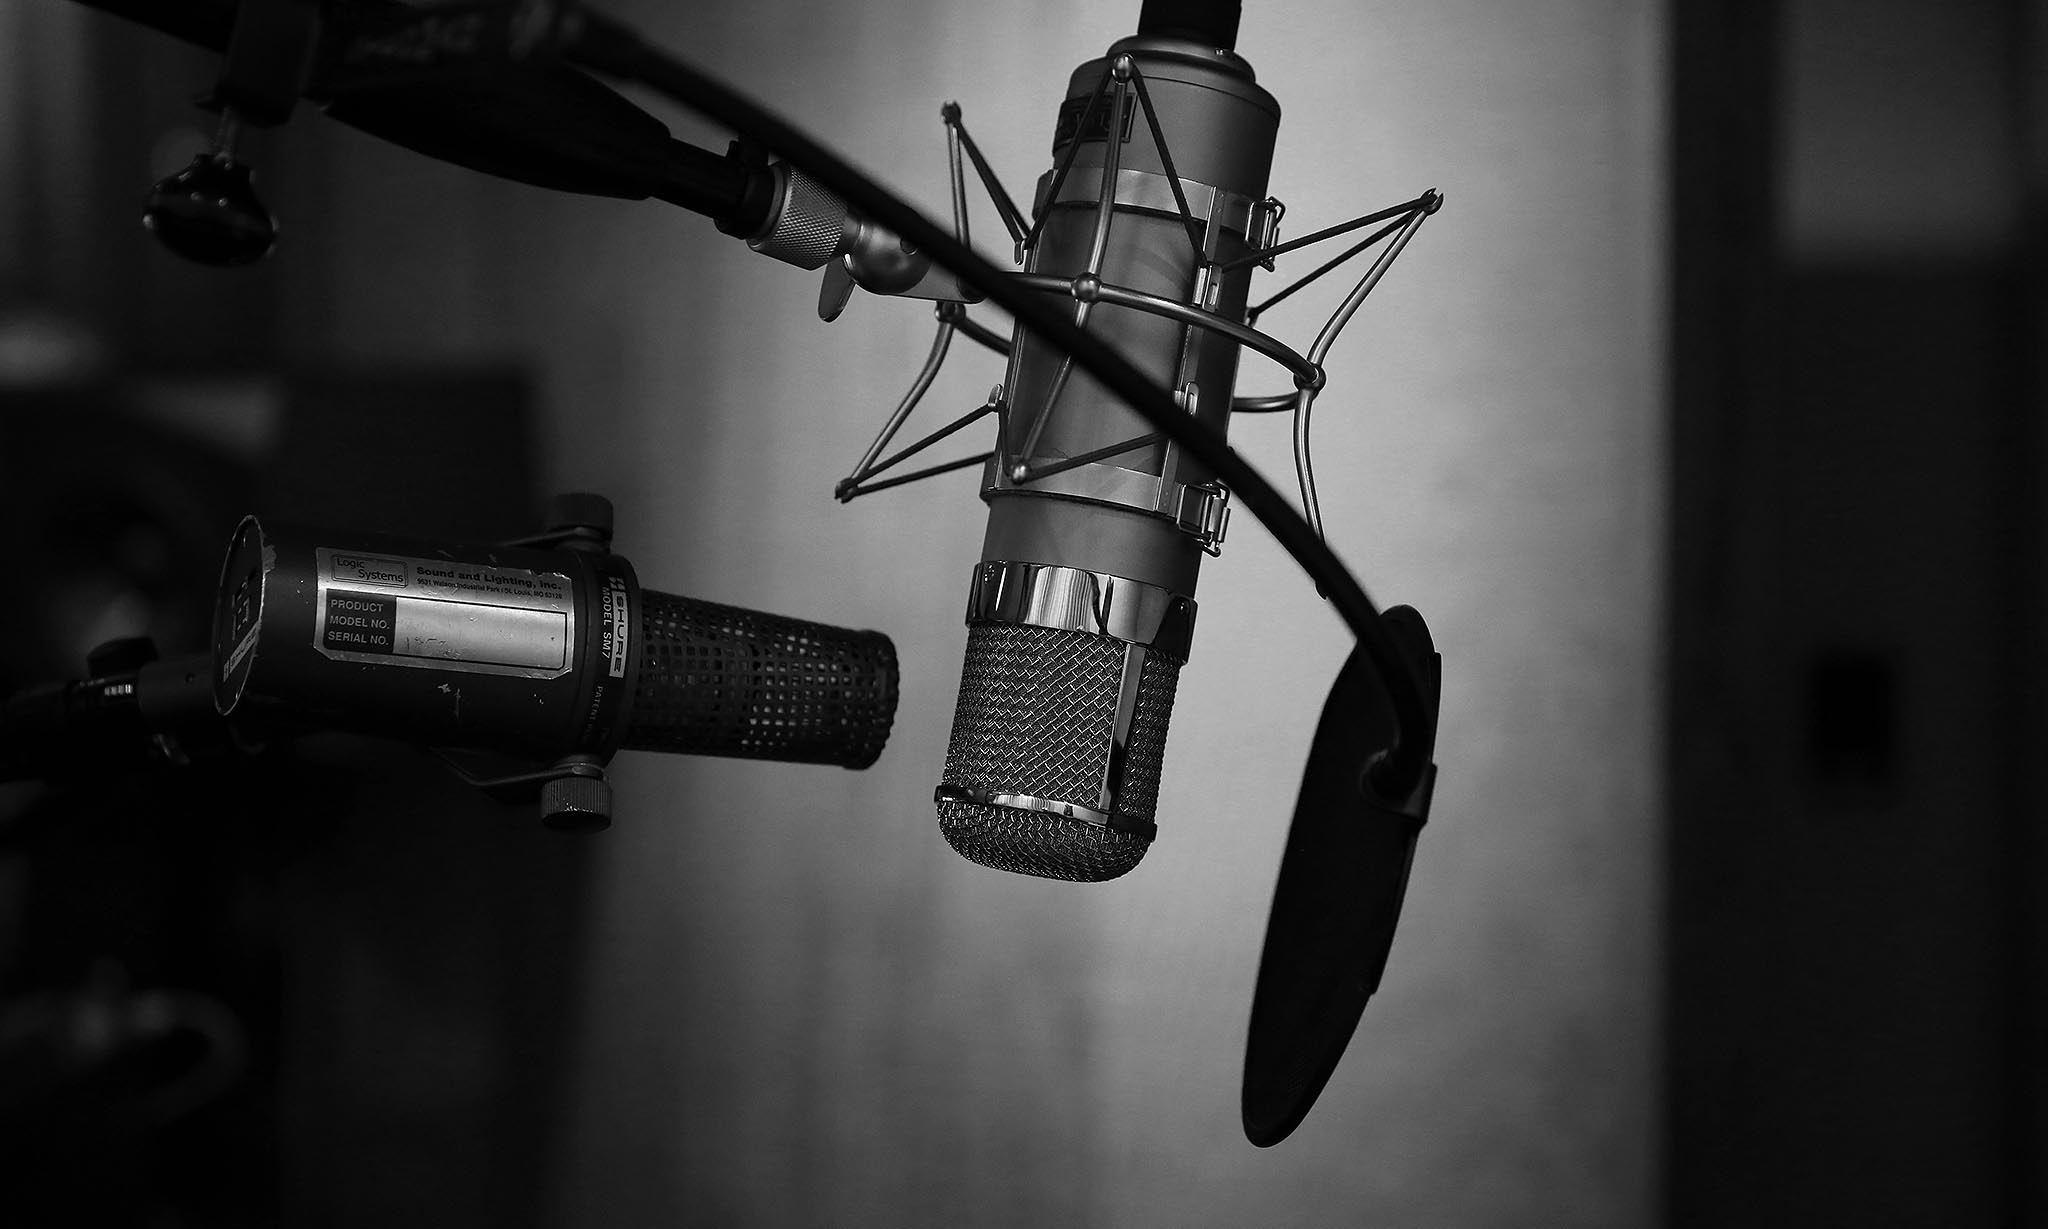
1. Poor Microphone Setup
The microphone is the heart of your recording setup. But simply owning a good mic doesn’t guarantee great results if it’s not set up properly. Many rappers make the mistake of using incorrect mic placement or neglecting tools that improve sound clarity.
What Goes Wrong:
- Mic Positioning: Too close, and you’ll pick up excessive plosive sounds (hard “p” and “b” sounds), while too far away, your vocals can sound distant or thin.
- Environmental Noise: Without a pop filter or proper setup, your mic will pick up room noise, reflections, and even subtle mouth sounds that degrade the quality of your vocals.
How to Fix It:
- Mic Placement: Position the mic about 6 to 12 inches away from your mouth, aimed at a slight angle to avoid direct bursts of air hitting the diaphragm.
- Pop Filter: A pop filter is essential for catching plosives and minimizing harsh sounds. It’s an inexpensive tool that can make a big difference in the clarity of your recordings.
- Reflection Filters: If your room isn’t sound-treated, a portable reflection filter behind your microphone can help reduce ambient noise and echoes, giving your recordings a cleaner, more professional sound.
2. Not Treating the Room for Sound
One of the most common mistakes home-recording rappers make is recording in a space that’s not treated acoustically. The sound of your voice bouncing off bare walls can add unwanted reverberation and echo, making it harder to mix the track properly later on.
What Goes Wrong:
- Excessive Reverb: Rooms with hard surfaces reflect sound waves, causing reverb and muddiness in your vocals. This can be difficult to correct, even with EQ and other effects.
- Background Noise: Rooms with poor sound isolation pick up external noises like traffic, HVAC units, or even computer fan hums that can distract from the clarity of your vocal takes.
How to Fix It:
- Acoustic Treatment: Acoustic panels, bass traps, and soundproofing materials help absorb excess sound and prevent echoes. You don’t need a professional studio setup—a few well-placed panels can make a huge difference.
- DIY Solutions: If you’re on a tight budget, heavy blankets, rugs, or even foam mattresses can help deaden the sound. Recording in a closet with clothes around you can be an effective low-cost solution to reduce reverb.
- Location Matters: Try to find a quiet spot in your home, away from windows, appliances, and busy rooms. The less external noise, the cleaner your recording will be.
3. Ignoring Proper Gain Staging
Gain staging refers to managing the input levels at every stage of the recording process to avoid distortion or excessive noise. Many rappers overlook this critical step, which leads to vocals that are either too quiet or too loud and distorted.
What Goes Wrong:
- Clipping: If your mic input is too loud, it will “clip,” creating harsh distortion that’s nearly impossible to fix in post-production.
- Low-Level Recordings: If your gain is too low, your vocals will lack power and presence. Boosting them later introduces noise and degrades the overall quality.
How to Fix It:
- Set Proper Levels: Aim for your loudest vocal parts to peak around -6 dB to -12 dB on your DAW’s meter. This provides enough headroom to prevent clipping while still giving you a strong signal.
- Monitor with Headphones: Always record while wearing good-quality headphones. This allows you to hear the balance of your vocals in real-time and adjust the gain as needed.
- Use Compression Wisely: A light compressor can help control vocal dynamics during recording, ensuring consistent levels without distortion. Just make sure not to overdo it—too much compression can kill the energy of your performance.
4. Rushing the Recording Process
Rappers often get caught up in the excitement of creating a track and rush through the recording process, sacrificing quality for speed. This can lead to weak vocal performances, sloppy delivery, and missed opportunities to improve your sound.
What Goes Wrong:
- Sloppy Flow: Without enough time spent on the delivery, your flow may sound rushed, unbalanced, or off-beat.
- Missed Emotion: Rushing prevents you from capturing the right emotion and energy in your voice, which is essential to delivering compelling rap vocals.
- Limited Takes: Settling for the first or second take often leads to underwhelming results that could have been polished with a few more tries.
How to Fix It:
- Take Your Time: Be patient and give yourself the freedom to try multiple takes. Even seasoned artists often record dozens of takes to get the perfect one.
- Practice Before Recording: Run through your verses multiple times before hitting record. Know your lyrics, flows, and where to emphasize certain lines or words to create impact.
- Break It Up: Record in sections if necessary. Breaking down your verses into smaller parts can help you focus on perfecting each section without feeling overwhelmed.
5. Not Backing Up Your Work Regularly
You’ve laid down the perfect vocals and your project is coming together—until your computer crashes and you lose everything. Not backing up your work is one of the most heart-breaking mistakes a rapper can make.
What Goes Wrong:
- Lost Projects: Hard drives fail, software crashes, or files get accidentally deleted, wiping out hours or even days of work.
- Time Wasted: Without a backup, you may need to start over from scratch, and sometimes, the magic of the first take can’t be recaptured.
How to Fix It:
- Frequent Saves: Get in the habit of saving your project regularly during a recording session. Most DAWs have an auto-save feature that you can enable.
- Use Multiple Backup Locations: Back up your files in at least two places—an external hard drive and a cloud storage service like Google Drive, Dropbox, or iCloud. This ensures your work is safe even if one location fails.
- Version Control: Save different versions of your project as you go. This allows you to revert to an earlier state if something goes wrong during editing or mixing.
Bonus Tip: Not Learning Your DAW Inside Out
Your DAW (Digital Audio Workstation) is the central hub for your recording and editing. Many home studio rappers make the mistake of not fully learning how to use it, resulting in inefficient workflows and missed opportunities to enhance their music.
How to Fix It:
- Watch Tutorials: There are countless free tutorials on YouTube that can teach you how to navigate your specific DAW. Whether you’re using FL Studio, Ableton, Logic Pro, or Pro Tools, take the time to learn the basics and more advanced functions.
- Practice Makes Perfect: Spend time practicing different techniques within your DAW, like EQ, compression, automation, and vocal effects. The better you understand the software, the more creative control you’ll have over your sound.
Conclusion
Recording at home gives rappers the freedom to create music on their own terms, but it also comes with its own set of challenges. By avoiding these common mistakes—setting up your mic correctly, treating your room for sound, managing gain levels, taking your time with the process, and backing up your work—you can drastically improve the quality of your recordings. Remember, the key to success is consistency and attention to detail. The more time and effort you invest in learning proper recording techniques, the better your tracks will sound, helping you stand out in a crowded music industry.
Browse Beats & Instrumentals
Check out my extensive catalog of more than 500 custom-made beats and instrumentals, available for free download or licensing.
No Comments